Creativity & Constraint in Music: A Dawless Perspective - Part 3
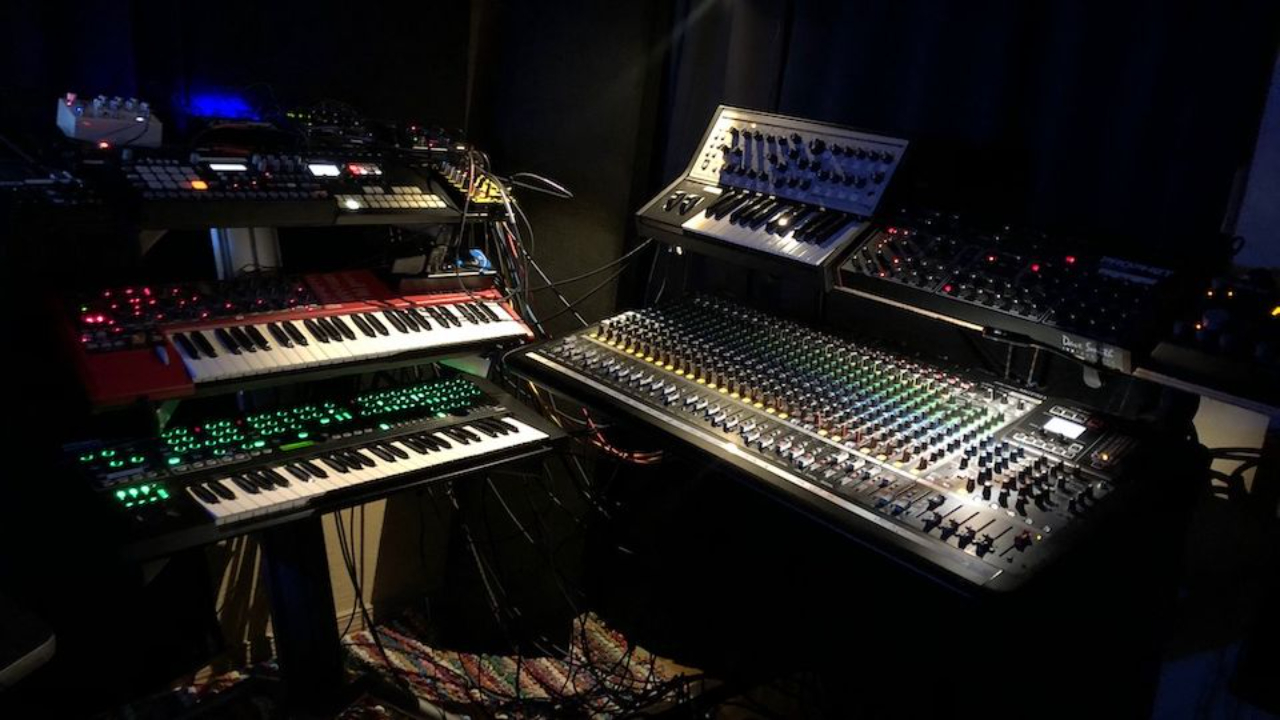
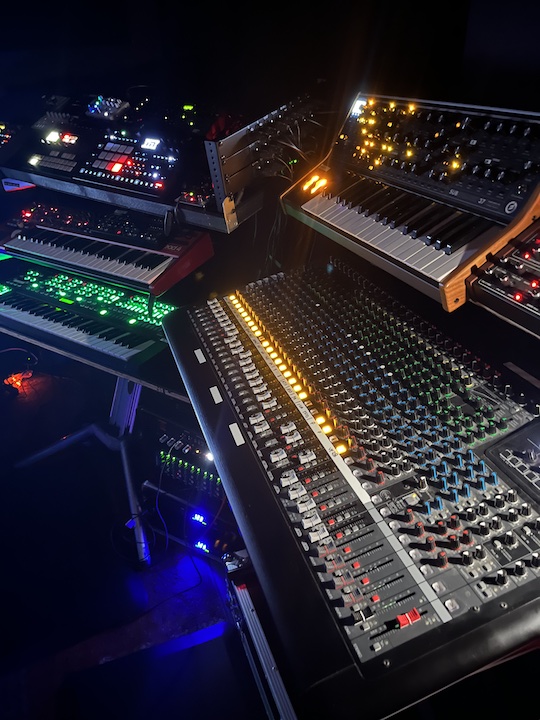
An old iteration of my rig, "the terminal". Some aspects have changed while others haven't. Whenever I make a change I have to "re-synth" the old songs; they never sound the same but I think that's kind of cool.
Hello friends. Welcome back for part 3 of A Dawless Perspective, a series in which we're exploring a different way to make electronic music.
Today we're going to get a bit philosophical; after all what is art without a little philosophy.
This philosophy has to do with how constraints (aka limitations) affect our musical output. There are examples of these constraints all throughout history where a musician's environment directly affected their music, something we don't really have to think about in our world of DAW-based production. What I think is extra interesting is that as dawless musicians we're engineering our own systems of constraints; our self-created sonic infrastructure is an act of art just as much as the notes we play.
I realize I'm getting a bit ahead of mys...
Studio on Stage - A Dawless Perspective Part 2

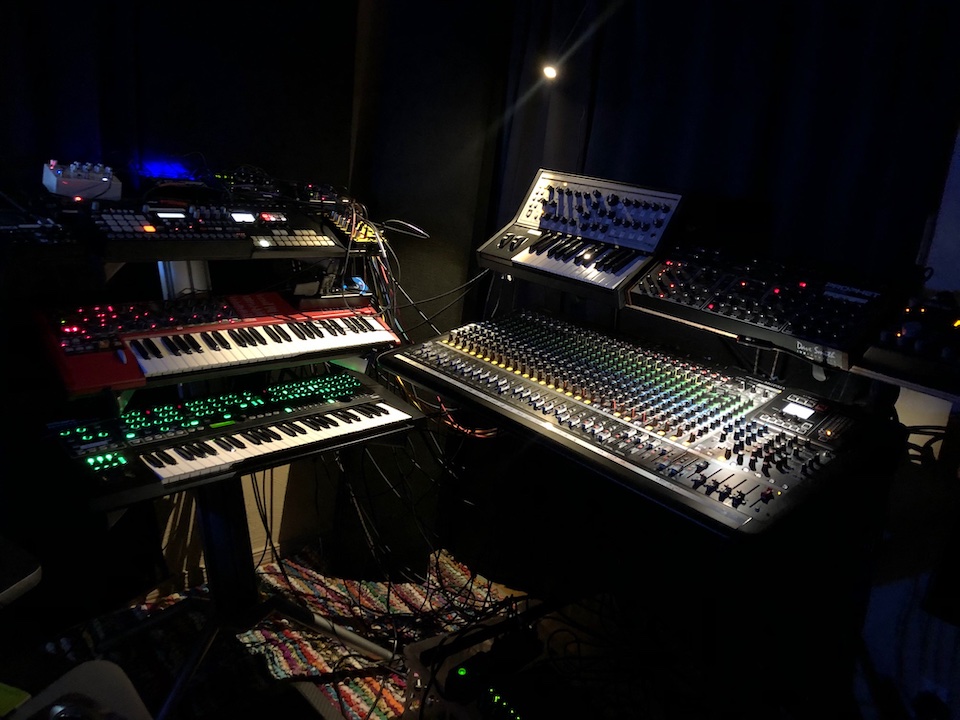
[ vt100's dawless synthesizer rig during a live performance ]
Welcome to Spaceship Design 101
Hello friends, welcome back. Recently I shared with you an article where we began to explore an unconventional style of electronic music production, dawless electronic music. In this style the music producer is focused on creating electronic music with music hardware exclusively, in real-time, at least for the purposes of composing and performing their music. This style is really not practical if I'm being honest, but it sure is fun. If you missed it, check out part 1 to learn more about the roots of dawless and why I find this artform so compelling.
When it comes to dawless electronic music production, the musician has quite a bit to think about and a seemingly infinite number of choices to make. Every step of the way is going to be unique and custom tailored to the musician by the musician themself. The musician is going to design a rig that has certain sound and control characteristics...
Hardware-only Electronic Music - A Dawless Perspective
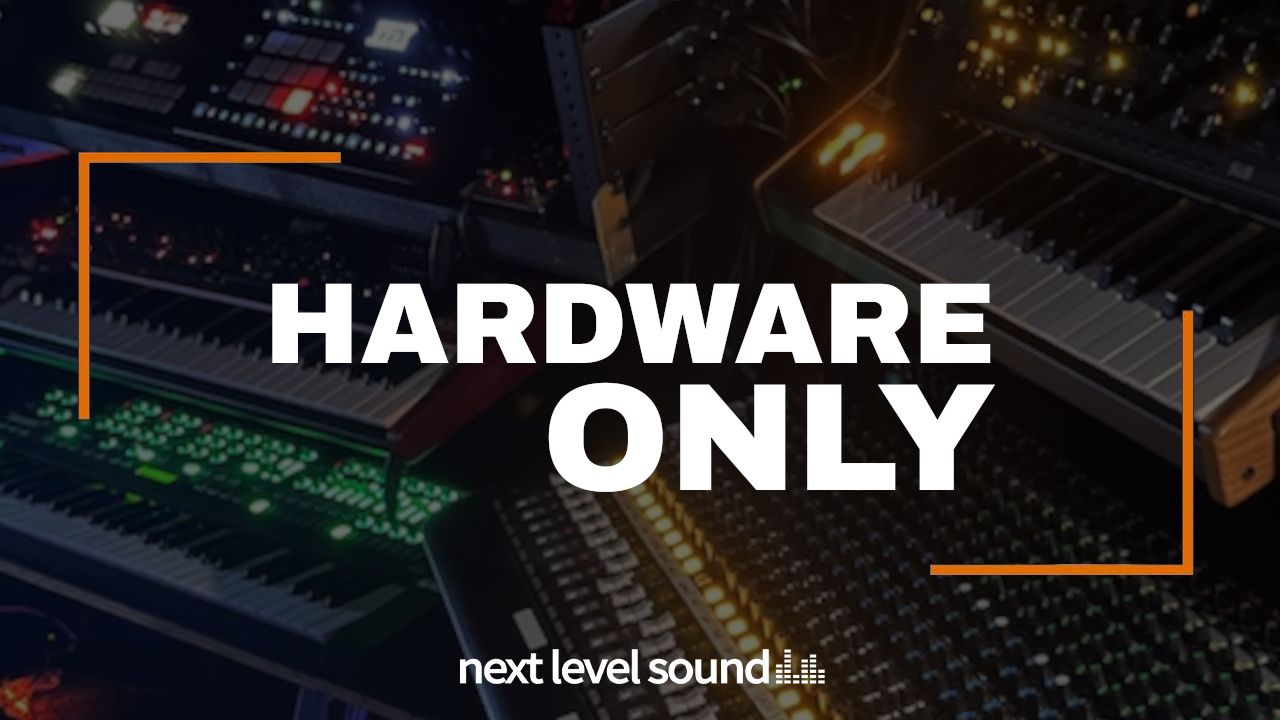
[ Dawless Electronic Music Hardware Setup Studio Synthesizers Mixer ]
What if you built yourself a spaceship…
and that spaceship just happened to play music?
Friends, I’d like to share with you my perspective on electronic music production; a dawless perspective. If you’ve been around a while making music, you know opinions on electronic music production are everywhere; there’s easily your pick of producers out there who will shed their light on your efficiency/sound/composition/whatever. You could stage dive right now (the stage is in your mind) and you’d hit at least 15 producers who’ve got advice for you no matter what DAW (aka music software) you use.
I’m not that producer. In fact, the way I go about making electronic music is not guaranteed to yield the “best” results. My style is also not the cheapest nor is it the most efficient. This style is full of limitations. I might even go as far as arguing that my style is… uh… complicated.
The secret is in the cables.
...
I have
Mixing Foundations: A Cookbook for the Modern Music Producer - Chapter 3 - Reductive EQ
This is Chapter 3 of Mixing Foundations – Learn how to identify and remove unwanted frequencies, why reductive EQ is one of the most important tools in modern and classic workflows, and how to use clean digital EQs like FabFilter Pro-Q 4 to bring clarity, punch, and depth to your mix. Explore the difference between low cuts, low shelves, and bell curves. Discover why taking out the garbage is often the most musical move you can make. (12–15 minute read)
How to use Reductive EQ like a Pro
Welcome back to the Next Level Sound: Mixing Foundations: A Mixing Cookbook for the Modern Music Producer.
As I mentioned earlier, and probably will mention a few more times over the course of this mixing cookbook, the chapter order reflects the order in which you perform the channelstrip processing workflow.
First, we saturate the sound by inflating it with harmonics and clipping. Then, we carve out the sound's profile, retaining its body while eliminating unwanted frequencies.
That’s a pretty ...
Mixing Foundations: A Cookbook for the Modern Music Producer - Chapter 2 - Saturation
This is Chapter 2 of Mixing Foundations – Saturation Explained: Everything you need to now about Saturation. Learn the differences between transformers, tape, and tubes, discover what harmonics are, and learn how to add warmth and depth to your mixes. (12–15 minute read)
The Importance of Saturation in Mixing
Saturation is so vital in mixing. I can tell you in half a second whether a producer or mixer is skilled or not with their use of saturation. More often than not, I bet the tracks that you really love have high-quality, thoughtful, and intentional saturation. But what exactly is saturation?
I always explain it like this:
Someone went to the kitchen one day to warm up bread. They warmed it up in a pan on the stovetop and left it on too long, which caused it to change color and become hard and crunchy. But then they tried it, and it was incredible.
When you take soft bread and toast it, its molecular makeup changes from soft and bland to sweet and crunchy. That's the sa...
Mixing Foundations: A Cookbook for the Modern Music Producer - Chapter 1 - Introduction
This is the Introduction to Mixing Foundations—My personal experiences that laid the groundwork for our world-famous courses on saturation, compression, EQ, reverb, and much more. (8–10 minute read)
About the Author
Daniel Wyatt is a multi-genre, Emmy-nominated, Platinum-selling music producer, engineer, and educator based on the East Coast with over 40 years of professional experience.

My First Official Major Record Label Release
Recording the Album - A Tribute to Curtis Mayfield
Easily the most cherished memory of my music journey to date was flying to Atlanta to Curtis Mayfield's house and recording Curtis Mayfield's vocals for a track that I co-produced and played congas on for a band that I co-founded, Repercussions. I think I literally remember every second of that day - and I can replay the entire "movie" memory from start to finish.
That track became a single and was a cover of "Let's Do It Again" and was featured as track 3 on the Tribute to Curtis Mayfield Album th...
5 Reasons EDM Producers Should Choose Studio One

ads
5 Reasons EDM Producers Should Choose Studio One
I was asked by the esteemed online music school nextlevelsound.com if I could write a blog post giving 5 reasons why any EDM producer should consider Studio One. When starting to think about it I realized it was impossible to only mention 5 reasons so I asked if I could write a series of blogposts instead. But the theme will always be 5 reasons or features why you should consider Studio One.
This time I will be looking at 5 features that make it easy to start a new track idea with Studio One. One small disclaimer though, some of the features I will mention require the Pro version of Studio One.
1. Arranger track
When I start a new track it can sometimes feel overwhelming. We all know how easy it is to come up with an 8 bar killer idea and then after hearing the same loop for 4 hours you don't like the idea anymore and you try to come up with a new 8 bar idea and the process repeats itself.
What I do is that I...
How to Avoid Losing Your Ableton Live Collections
Steps You Can Take To Avoid Losing Your Ableton Live Collections!
"Ableton Live 10" introduced a great new feature called "Collections"
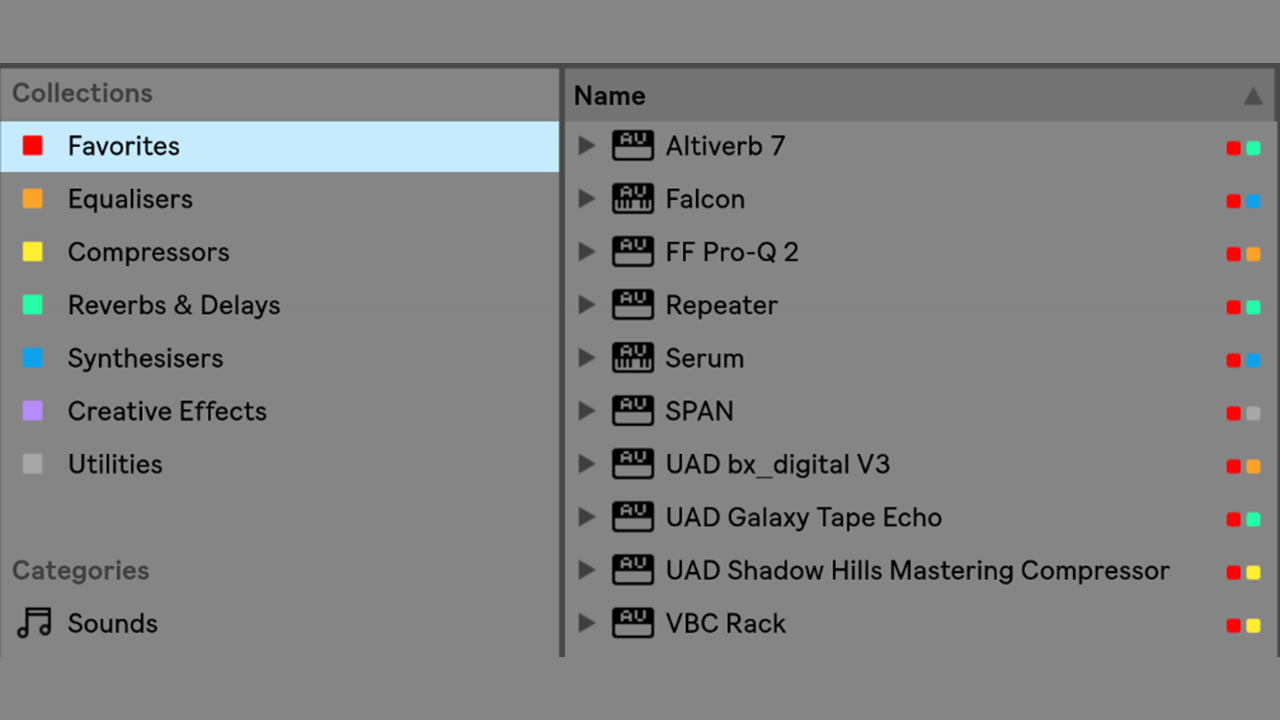
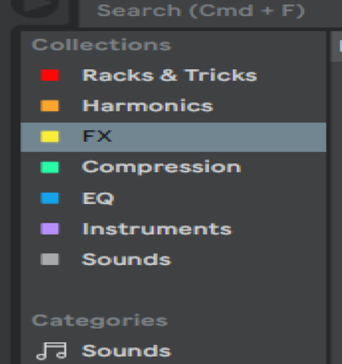
WHAT ARE COLLECTIONS?
"Collections" appear in the "Live" Browser Window
[Live Collection]
"Collections" are useful because they allow for another level of organization personalized to the way you work. You can add files, presets, Audio Racks, Instrument & Drum Racks, devices, samples, sets, etc. (anything that can be displayed in "Live's" Browser Window).
There is a maximum of 7 "Collections", coded by the color that, can be renamed. (Currently, the colors are hardcoded and can not be changed).
You could create a "Collection" for Compressors or EQs, for Instruments or Sounds.
For example, I created a "Collection" for the Racks that I have made and those of third-party producers that I work with.
To add an item to a "Collection" Right Click on the item and select a color. The item will now appear in the "Collection" assigned to that color.

Why Music Producers and Engineers Shouldn’t Upgrade to Mac OS 10.15 “Catalina” Immediately

Why Music Producers and Engineers Shouldn't Upgrade to Mac OS 10.15 "Catalina" Immediately
Those of us who are working full time as music producers or audio engineers typically don't upgrade our operating system the minute a new release or update comes out.
Many of us have learned the hard way over time.
No matter how much "Apple" beta tests there will always be some compatibility issues with software or hardware when a new Operating System (OS) release or update comes out. (This also applies to the latest update of a plugin or application as well).
All it takes is one minor thing that some developer didn't take into account (or wasn't aware of) and we could be dead in the water; causing us to miss deadlines, having to recreate parts, or worse yet, entire sessions!
With "Digital Audio Workstations" ("DAW") upgrades we are cautious, knowing that, most likely, there will be hardware and/or software (plugin) incompatibilities with a new release.
Some engineers and producers NEVER up...
Cubase 10 Best New Features Explained - Part 1

Cubase 10 Best New Features Explained - Part 1
In case you haven't noticed, Steinberg's Cubase 10 is out. You can download the free 30-day trial version to try the new features. The Cubase 10 Download link can be found on the Steinberg website. The download link for Cubase 10 Pro is at the bottom of the page.
Like every year the new version of Cubase offers a bunch of new tools and improvements. Since there is a lot of new stuff to talk about I broke up the top 10 items into 2 blog posts. In this post, I will show the first 5 of the best new features that improved my workflow greatly. Part 2 will cover an additional 5 features in an upcoming blog post.
1. Simplified Side-Chaining
The most common use of Side-Chaining is called "Ducking". It is commonly used by radio stations. As soon as the moderator speaks the music turns itself down automatically and after the moderator is done speaking the volume rises again. This is achieved by putting a compressor on the music with a side-cha...