5 Reasons EDM Producers Should Choose Studio One

ads
5 Reasons EDM Producers Should Choose Studio One
I was asked by the esteemed online music school nextlevelsound.com if I could write a blog post giving 5 reasons why any EDM producer should consider Studio One. When starting to think about it I realized it was impossible to only mention 5 reasons so I asked if I could write a series of blogposts instead. But the theme will always be 5 reasons or features why you should consider Studio One.
This time I will be looking at 5 features that make it easy to start a new track idea with Studio One. One small disclaimer though, some of the features I will mention require the Pro version of Studio One.
1. Arranger track
When I start a new track it can sometimes feel overwhelming. We all know how easy it is to come up with an 8 bar killer idea and then after hearing the same loop for 4 hours you don't like the idea anymore and you try to come up with a new 8 bar idea and the process repeats itself.
What I do is that I always start by drawing the blocks for the arrangement. I study the latest trends for the genre I produce in and then I draw down the arrangement blocks in the Arranger track in Studio One. If it is a club-oriented EDM track I would probably come up with something like:
 [ Studio One Arranger Track ]
The cool thing is that you can move and copy these arranger blocks with drag and drop. This means that you can save a lot of time by working on the first drop and then just copy that block to the second drop and then just tweak the second drop to your liking.
2. Midi Scale Lock
To be honest, I haven't studied music theory as much as I should even though I know the basics. For me, any help I can get with musical composition is highly appreciated. This is where the Midi Scale Lock comes in.
First, we have to decide on a key for the track. You can easily do this when creating the song but you can change it at the bottom of the arrangement view as well. In this example, I have chosen G minor. When you double click on a midi event or create a new one by clicking on an empty area you will see the musical event inspector on the left.
Click on the checkbox next to the small keyboard where it says scale. Now Studio One only allows you to enter notes in the key of G minor. However, you can override this by moving the existing notes with your arrow keys or just disable the checkbox again.
This makes it super easy to input 3 musically correct chords in the key of G minor. In this example, I have added G minor, F major and D#major
 [ Studio One Midi Scale Lock ]
3. Chord track
OK, now we have a great starting point. A chord progression. Let's see how we can use this to continue on our idea. Studio One has a chord track that you can enable. After enabling the chord track we can right-click on our midi event with the chord progression we just did and find something called "Extract to Chord Track". Studio One will now analyze the midi event and extract the chords to the chord track as you can see in the picture below.
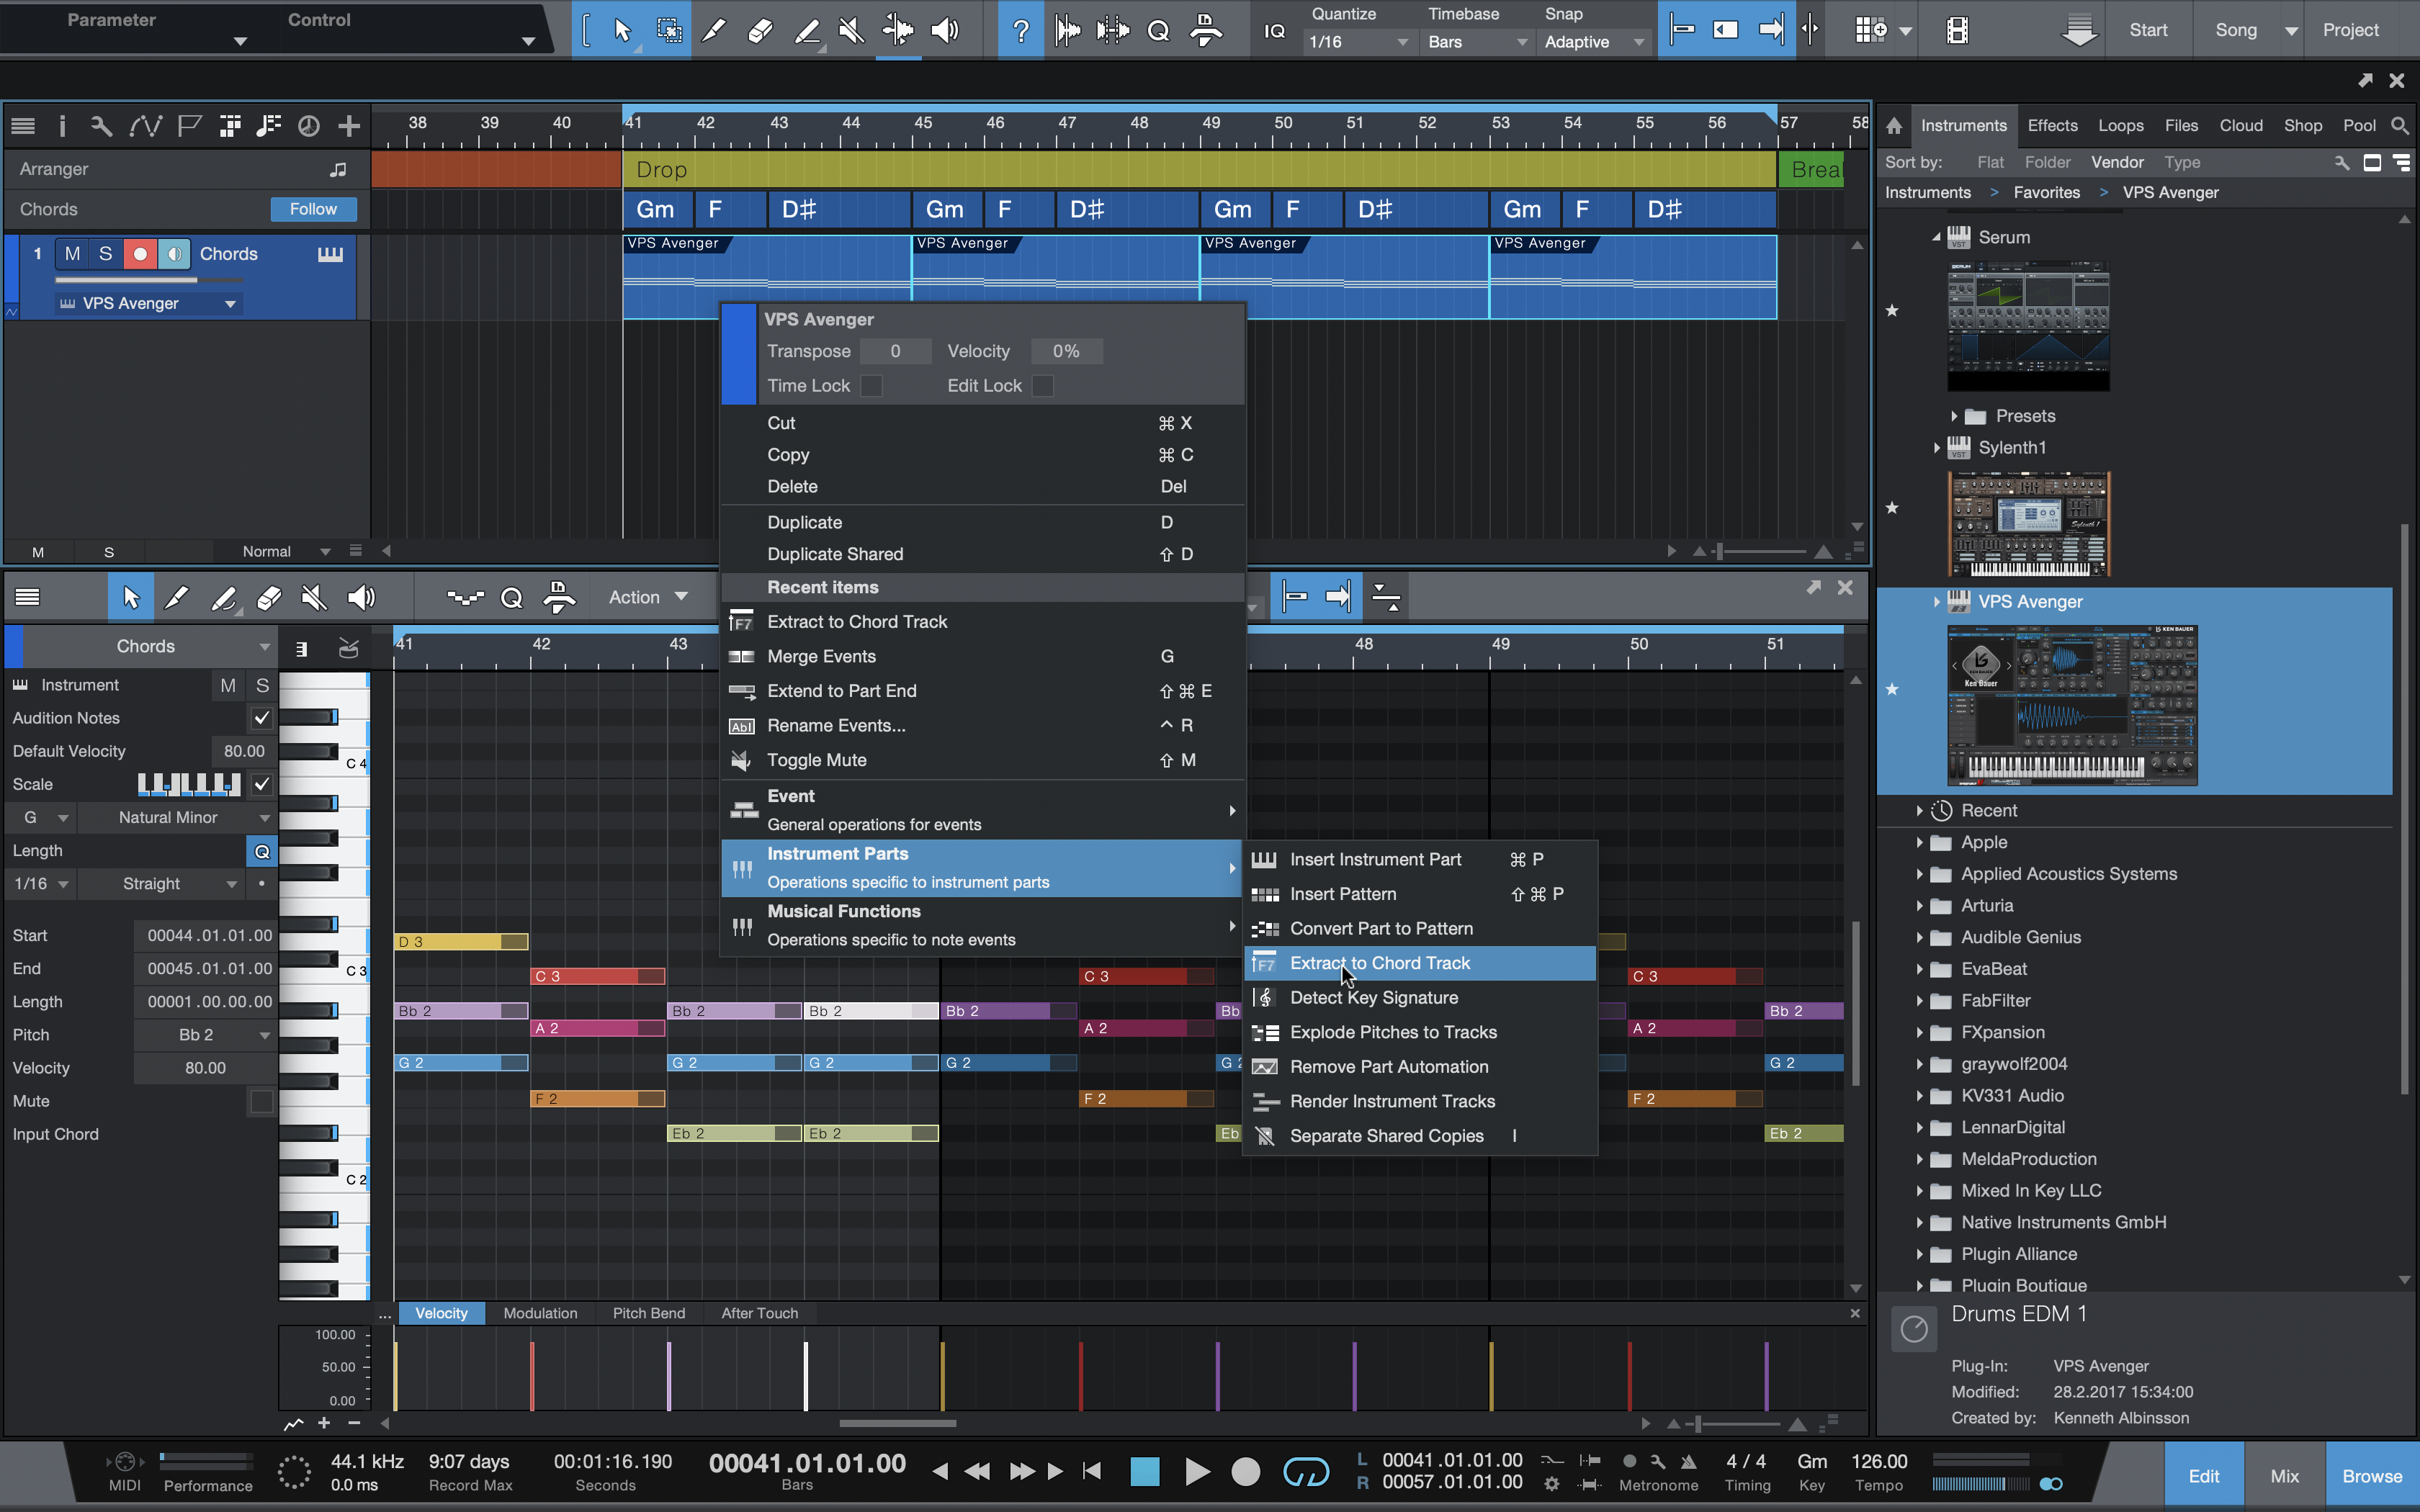 [ Studio One Chord Track - Extract to Chord Track ]
Now let's go ahead and add another VST instrument with a bass sound. Then I will just add a bass rhythm playing the same note, in this example, just the note G
 [ Studio One Chord Track - VST Instrument ]
Now I will open the track inspector for the Bass track by clicking on the "i" button on the top left. There I will find something called "Follow Chords" which is Off by default. Now go ahead and choose "Bass". Now, this Bass track will follow the bass of the chords. See below how the bass pattern changed to follow the chords:
 [ Studio One Chord Track - Follow Chords ]
4. Multi-Lane Midi Editor (Ghost Notes)
Now we have to come up with a melody and to make sure we use only the right notes I will be using two great features in the Midi editor. The first one is coloring all the notes by Pitch. This means I can easily see that the bottom bass note in the example has the same note as the bottom G-note in the chord above. The second awesome feature is the "multi-lane" button in the middle left (blue box with 4 white lines). This lets you choose any track from your list of Instrument tracks to have it being displayed while editing the midi of another track.
In the example below I am displaying both the chord track and bass track together with my new melody track. However, the only track that I will edit is the track having a "blue pencil" which in this case is the Melody track. Now I can easily find notes belonging to the chords as well as making sure they time well with the bass rhythm.
 [ Studio One Multi Lane Midi Editor - Melody Track ]
In this example, I have added a melody.
 [ Studio One Multi Lane Midi Editor - Added Melody ]
5. Groove Assistant
After adding a 4X4 KICK and a straight hi-hat pattern I realize that the hi-hat pattern needs a better groove. I goto Splice and download a cool hi-hat loop. However, I don't want to use the loop, I just want to use the groove from the loop. In the pictures below you can see my original hi-hat pattern and the loop I downloaded from Splice.
 [ Studio One Groove Assistant - Original HiHat Pattern and Loop ]
Then I will enable the Groove Assistant by clicking on the "Q" icon on the toolbar and select Groove. Now all I have to do is drag the audio loop event at the bottom to the Groove area as you can see below.
 [ Studio One Groove Assistant - Drag Loop Event to bottom of Groove Area ]
The groove is now extracted, and you can now use it as a Quantize template and/or save it for later use. Now I click on my hi-hat event and press "Q" for quantize. Voila, the straight 1/16 hi-hat pattern has now inherited the groove from the audio loop. Now if I would like to I could use this groove pattern for all my basslines and melodies to keep everything in the same groove.
 [ Studio One Groove Assistant - Quantize Template ]
All in all, these are 5 features that help me start a new track quickly, the arranger tracks give me a great overview and sort of a to-do list. The Midi Scale makes sure that I create my chords in the key. The Chord track is great for having all my other tracks, such as the bassline, following the same chord progression.
The multi midi editor (Ghost Notes) makes it is easy to draw in a melody that is in key and sounds good together with my chords and bassline. Finally, the groove editor is great for "borrowing" grooves from both audio and midi files.
 [ Studio One Groove Assistant - Groove Editor After Processing ]
Author, Ken Bauer
Stay connected with news and updates!
Join our mailing list to receive the latest news and updates from our team.
Don't worry, your information will not be shared.