Mixing Foundations: A Cookbook for the Modern Music Producer - Chapter 2 - Saturation

This is Chapter 2 of Mixing Foundations – Saturation Explained: Everything you need to now about Saturation. Learn the differences between transformers, tape, and tubes, discover what harmonics are, and learn how to add warmth and depth to your mixes. (12–15 minute read)
The Importance of Saturation in Mixing
Saturation is so vital in mixing. I can tell you in half a second whether a producer or mixer is skilled or not with their use of saturation. More often than not, I bet the tracks that you really love have high-quality, thoughtful, and intentional saturation. But what exactly is saturation?
I always explain it like this:
Someone went to the kitchen one day to warm up bread. They warmed it up in a pan on the stovetop and left it on too long, which caused it to change color and become hard and crunchy. But then they tried it, and it was incredible.
When you take soft bread and toast it, its molecular makeup changes from soft and bland to sweet and crunchy. That's the same thing that happened in analog engineering.
Engineers were recording and mixing, working hot and heavy in the studio - running things through consoles, tape machines, and compressors, and one of the engineers turned around and said, “Hey, you’re overloading the input! Can’t you see that? You’re distorting it.” And the other engineer was like, “Yeah, but it sounds amazing.”
In the analog days, you almost didn’t have to worry about saturation because it was on everything; you couldn’t help it. Tape saturated. Consoles saturated. Tubes from the compressors are saturated. You couldn’t escape saturation if you tried. And people really did try. And what's funny is that in the ’90s, people complained about the saturation. They said, “I wish it were clean and clear and digital. I hate all this; everything’s coloring my stuff.” And then as soon as we got the real clear thing, people were like, “Where’s my saturation? It sounds thin and small and cold!”
Now we pay for plugins to put the saturation back in. The way we look back fondly on saturation is much like how we enjoy the film texture of black and white movies now—there’s a poetry to it.
If you look at old black-and-white photographs of your family, you might think everyone had perfect skin! And maybe they did, the rich saturation of vintage film was smoothing and flattering. It works the same in mixing.

[ Vintage 12‑Channel Helios ]
How Producers Reacted to the Digital Era
When Pro Tools entered the scene, everyone was so excited that you could copy and paste the verse and chorus, change arrangements, fix mistakes, and get away from analog tape and analog summing. And while all of these new capabilities were truly revolutionary, not everyone was happy with the sound. Engineers and producers felt that while they had gained something, they had also lost something very important - the richness and groove of analog tape, and the rich density of analog summing. So hybrid models began to appear. When Pro Tools finally gained acceptance, the big producers would use a Pro Tools system with numerous outputs and run it through consoles. The most famous hip-hop producers would even take their drum machines and print the output to analog tape, then reinsert it into Pro Tools. People missed that analog sound.
The Creation of Saturation Plugins
As companies continued to develop more digital gear, they sought to replicate the behavior of analog devices when overloaded: the sound produced when the input is overloaded, and occasionally, when the output is pushed beyond its limits.
When I first met Howie Weinberg (Nirvana, Beastie Boys, Twenty-One Pilots), we handed him our DAT tape (digital audio) and he grabbed it from our hands, slamming the mix onto his Studer 2-track tape machine with the needles pinning. And then he used the Studer as the playback for his mastering chain. And yeah, the sound was massive and powerful.
So, saturation is a polite word for distortion. It’s what happens when you overdrive the input (and sometimes the output) of analog devices. It makes things richer. It fills in missing frequencies in sounds.The more you overdrive it, the more you're making toast—and you can also really crunch things out, just like burning your toast. Some of the world’s finest restaurants insist on serving carefully charred toast for certain dishes.
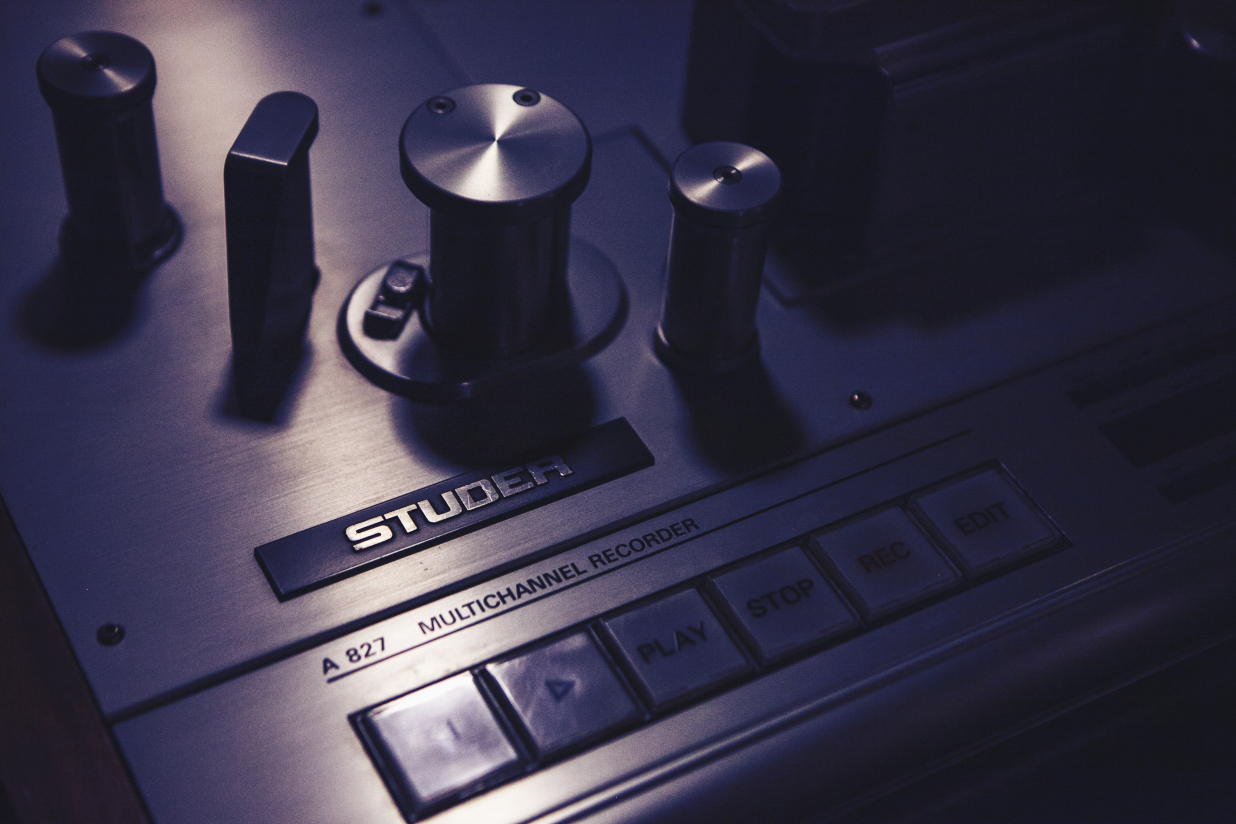
[ Studer A827 Tape Recorder ]
The Next Level Sound Mixing Workflow
Okay, now let’s talk about workflow. The order of chapters in this book (which is being released in this series of blog posts) is a microcosm of the order in which you process sounds during mixing. It is a channel strip workflow that has an inherent logic, creating consistent and repeatable results.
The workflow is as follows:
- Saturate
- Reductive EQ
- Compress
- Additive EQ
- Sidechaining
- Reverb
So, as you can see, we are talking about saturation first, because that is the first step in the channel-strip workflow. (Our next chapter will discuss reductive EQ.) Are there exceptions to this order? Yes. For example, you might have a sound when mixing that has an excess of “rogue” low-frequency. Sending that sound into saturation will excite parts of the sound that you don’t want or need. In this case, reductive EQ before saturation makes sense. However, for the most part, this channel strip workflow order works incredibly well and is a solid workflow choice.
Why We Saturate First
So, when working on a project, the first thing we do is saturate stuff. Why do we do that? Why don’t we saturate at the end? Well, we don’t want to sit there EQing, compressing, doing all this other stuff, and then saturating because saturation changes everything so dramatically. It would make all of the activities essentially a waste of time. First, we inflate the sound. We bring out all the harmonics, and then we chop off the extra low end we don’t need, we chop off the extra high end we don’t need, and we can pull stuff out of the middle, like weird resonances and other elements we don’t like.
Note: While this is a good approach, it's often useful to remove unwanted frequency ranges and resonances before saturation. A boomy low end will add a ton of harmonics to the signal that cannot be EQ’d out later; the same goes for resonances. In some cases, it’s good to compress before saturation, especially for recorded instruments with wide dynamic ranges that would cause inconsistent saturation.
The Four T’s of Saturation
There is an infinite variety of saturators in the universe. However, saturation and all its flavor can be better understood by looking at the four main types: transformer, transistor, tape, and tube.
Transformer
Transformers slow down transients and compress the signal, making the sound fuller, thicker, and denser. Transformers also influence the dynamic character of the sound. Some have a significant, slow-moving LF response, while others have a very dynamic and tight LF response. Transformers produce harmonic saturation that is more evenly ordered in the HMF and HF, and third-order in the LMF and LF, similar to tape. Transformers often sound fat in the LF, punchy in the MF, and silky in the HF.
Two effects cause transformer distortion: hysteresis for low-level signals and saturation for high-level signals. Due to differences in hysteresis distortion, distortion decreases rapidly as the frequency increases.
There’s a school of music production for classical and jazz in which they want the recording to be such that when you listen to it, you feel that you are there, like you have the best seat at Carnegie Hall, the best seat at Saint John the Divine, a beautiful Berlin concert hall. I guess you could call this a naturalist approach. This method uses two microphones placed right where your two ears are. They use no reverb, no EQ, no compression, and nothing else. This results in a recording that makes you forget you’re sitting in your living room listening; you feel like you're in those great concert hall seats.
If you want the least amount of saturation, you want things that are transformerless. Classical and jazz recording engineers tend to use transformerless equipment for this reason. My studio amplifier is transformerless, meaning it has the fastest, cleanest signal path to my speakers. So, when I'm listening to something, I can actually hear the saturation that’s within the music, but my playback system is not saturating. And it's a very clinical monitoring sound. It took me a while to get used to it—it was so clean it freaked me out at first.
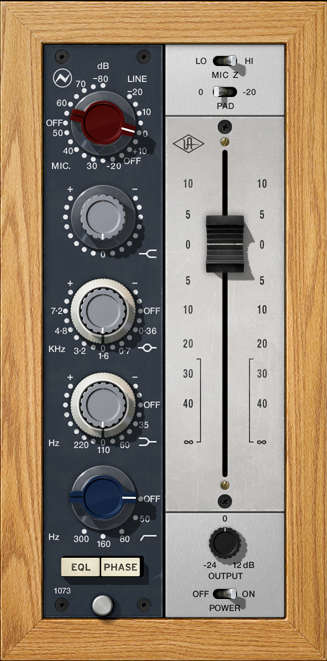
[ Neve 1073 Preamp Emulation ]
Transistor
Transistor saturation sounds gritty and fuzzy with a good bit of texture. It’s achieved when the input levels on hardware are overloaded, resulting in predominantly odd-order harmonics and hard clipping compression. Sometimes it’s pretty subtle, and other times it is a noticeable distortion, depending on the hardware.
Typical transistor amplifiers have much wider bandwidths than tube amplifiers because there is no transformer; this is especially noticeable at low frequencies.
Plenty of plugins are designed to replicate the sound of transistor-based circuits. One of my favorites is the Neve 1057 mic preamp, which is meant to replicate the particular sound of a germanium transistor. People loved that sound; it’s very coveted.
Console saturation is classy. It can be subtle, but the effect over multiple tracks is accumulative and profound. Console colour adds a flavour of saturation from transistors and transformers that fattens up the sound and smooths out peaks.

[ SSL 4000 E Console Emulation ]
Tape
I love tape. Tape is an essential part of our system; it makes the music groove. Tape gives a rubbery, bouncy low end to kicks, basses, and a whole mix. Do you need to put tape on a hi-hat? Maybe not. Does tape have to be on every single guitar? It can sound good, but perhaps it doesn’t need it. But it's crucial for kicks and basses and the mix as a whole.
Tape saturation smears and softens high frequencies and adds body and power to low frequencies. It yields a colouration and compression that is often described as 'warm' and cohesive, ' with solid low end and overall presence making instruments glue together musically.

[ ATR-102 Mastering Tape Emulation ]
Tape Speed and Formats
Analog tape frequency response is non-linear. Tape speed and track width will greatly affect the response at both ends of the audio spectrum. Increased tape speeds extend high-frequency response but also accelerate low-frequency roll-off. Each tape type has its own subtle sonic variation, distortion onset, and tape compression characteristics.
30IPS tape speed is open sounding with a tight bottom end. 15IPS has an extra octave in the lows, and the high-frequency bump is more audible. Due to its low‑end response and general compression characteristics, 15IPS is the most often used speed for dance music.
Bias
High-bias settings reduce high-frequency response with more saturation and compression. Low bias settings are cleaner with better higher frequency response; very low bias settings cause the signal to distort and gate. Over-biasing minimizes low- and mid‑frequency harmonic saturation. However, this optimization is at the expense of high-frequency extension and transient accuracy — producing a “warmer” sound - perfect for drums, bass and synths.
Tape EQ
The HF shelf is used to tune the signal's high-frequency content before hitting the tape, making up for the high-frequency loss due to bias optimisation. The Bias and HF parameters can be used to alter the saturation characteristics.
The Repro EQs adjust the low and high frequency content of the signal coming from the tape circuitry. They are typically used to shape the sound to maintain a flat frequency response.
Nab and IEC
To prevent everybody from doing their own thing and having no compatibility between recorded tapes, standard equalisation curves were developed in the 1950s and 1960s. NAB (National Association of Broadcasters) is an older standard and tends to have a warmer sound. IEC (International Electrotechnical Commission) is a more modern standard with more HD quality.
Wow and Flutter
Wow and Flutter are “undesirable” pitch modulations induced by the mechanical components of the tape transport. Wow is a by-product of capstan irregularities, while flutter is a by-product of tape stretching and sticking. Both can be effectively used for creative purposes. Wow usually refers to very low-frequency fluctuations, while Flutter refers to faster fluctuations. Wow and flutter are measured as the percentage of deflection from the original pitch. Both are more pronounced at lower tape speeds.

[ Studer A800 Tape Emulator ]
Tube
There are two significant divisions regarding amplification equipment: solid state and tube.
Solid state can either be discrete, which is where they solder each little piece together like jewelry, or it can be integrated amplifiers, which consist of pieces of plastic made in a factory, not by people.

[ Manley Variable Mu Limiter Compressor ]
Tubes have a tube amplification system; tube saturation gives lots of low-ordered, even and odd harmonics. This type of saturation is best known for providing that “warm” sound many musicians long for, and it can also give your mix dimension and even a perceived volume boost.
Tube amplifiers typically overload gracefully, a characteristic which turns them into a form of compressor, fattening sounds when pushed past their linear region.
Triode: bright buzzy edge.
Pentode: crunchy and raw.

[ UAD Thermionic Culture Vulture ]
Tube distortion increases as the signal gets louder, as they do in a musical performance. As instruments play louder, or as you hit a percussion instrument or piano key more strongly, they generate more harmonic content. As notes decay, the percentage of harmonic content drops again. With this progressive, "dynamic" distortion, tubes add sharp attacks while retaining long sustains.
When you increase the input level into a tube, clipping happens gradually—this is sometimes referred to as soft-clipping. Additionally, the harmonic overtones produced by tube saturation tend to be weighted towards even-order harmonics. Even-order harmonics are often described as more musical. Even-order harmonic distortion also produces a smoother and more even fuzziness at extreme levels.
Plugin and Play: Decapitator
If you’re unfamiliar with Soundtoys, it’s a big bundle of plugins that includes one of my favorites: an excellent single band saturator, Decapitator. The designer of Soundtoys, Ken Bogdanowicz, is a friend of mine and a super-smart guy. He said making Decapitator took him a year and a half to get it to sound and respond in this nonlinear, musical way, just like the real analog hardware did.
At NextLevelSound, Decapitator has legendary status, and we often place it first in the signal chain of channel strip processing. Since it is often the first insert, we need to be aware of how loud we are inputting to Decapitator.

[ Soundtoys Decapitator ]
Some Decapitator Features and Functions to Note:
- There’s a special thumb switch that’s mostly for kick drums; it puts a little bump of energy, like a note before the cut, creating a cool effect.
- There’s a tone knob that’s after the saturation, it brightens things up and cuts bass at the same time, so you can either make things thinner and brighter or darker and bassier.
- With the wet/dry mix, you can blend the saturated signal with the unsaturated signal.
- And if you want extreme amounts of saturation, you can hit the punish button.
If you go into Decapitator too loud, you won't be able to work within the sweet spot to get the saturation right. You can't do a gentle saturation because you’re already coming in so loud. So, you always want headroom coming in. So you must manage your “clip gain”. -12 to - 6 dB of headroom to being channel strip processing is recommended.
How To Saturate
NEVER NORMALIZE YOUR TRACKS BEFORE CHANNELSTRIP PROCESSING!
How to find the Sweetspot - Follow Engineering Etiquette:
- OVERDO IT RIGHT AWAY
- THEN BACK OFF
- DIAL IT IN
BYPASS RELIGIOUSLY
Whenever you're setting something and you’re trying to find the sweet spot (according to your own ears), one of the first things you should do is overdo it.
Just take an input and overdrive to see how far is too far, and then back off so you can fine-tune it. This way, you get to see right away what the extremes are of whatever you're working with, and you get to see where distortion lives (visually) so you know if you’re distorting or not.
Note: It’s much easier for the human ear to hear big jumps of sound at first than to take something and move it incrementally.
Another thing you should do when using Decapitator — or any other comparable plugin is to toggle the bypass button constantly like a crazy lunatic neurotic bypasser.
Again: Do something extreme, back it off, fine-tune it, bypass, bypass.
Bypassing is the comparative method; it’s how we hear if something sounds better or is going in the right direction. Decapitator is also great for answering a common question people have: Does saturation make things louder? Hell, yes, it does! And not only can you hear the difference, you can see it visually using FFT technology. Watch those mountain ranges grow when you toggle the Decapitator bypass on and off.
The Five Flavors of Decapitator
If you look at Decapitator, you’ll notice there are five flavors the makers have modeled: A, E, N, T, P.

[ Soundtoys Decapitator Flavors Highlighted ]
A: Ampex 350 Tape Preamp
This is an Ampex mic preamp that has a big transformer sound. It uses 12AX7 Tubes, the same tube as used in Manley Vari-Mu. It has a smooth, warm drive and frequency response with a subtle dip in the upper mids.

[ Fabfilter Pro-Q Analyzer displaying Ampex Tape Harmonics ]
E: EMI Chandler TG Channel)
This is an EMI channel, a type of mic preamp characterized by a large transformer sound.
It has a fat and rounded low end and a smooth, yet airy, top-end sheen—great for drums and synths!

[ Fabfilter Pro-Q Analyzer displaying Decapitator setting 'E' Harmonics ]
N: Neve 1057 Preamp
This is the previously mentioned Neve 1057, a mic preamp that replicates the sound of a germanium transistor. Warm, round, and soft. It has a weighty but solid LF with focused MF and a smooth/dark HF, ideal for edgy, buzzy, or hissy sounds.

[ Fabfilter Pro-Q Analyzer displaying Decapitator setting 'N' Harmonics ]
T: Thermionic Culture Vulture Triode
This is a triode tube, which allows the harmonics to go way up into the high end. Bright and clean, warm and punchy, it adds attitude to drums and percussive instruments.

[ Fabfilter Pro-Q Analyzer displaying Decapitator setting 'T' Harmonics ]
P: Thermionic Culture Vulture Pentode
This pentode tube offers a similar high harmonic range to the T flavor. P setting is dirty and grungy sounding, great for snares.

[ Fabfilter Pro-Q Analyzer displaying Decapitator setting 'P' Harmonics ]
Test Kitchen
While creating all of the content for the Next Level Sound mixing course, we started a tradition that we still continue to this day. Friday Test Kitchen. During the academic year, all of our advanced graduates would come together for a ruthless bench test of new plugins and technology. We run new products through lots of shootouts and blind testing and evaluate whether we really need it in our school curriculum or it’s redundant or simply half-baked. All of our test kitchen participants joke that we have collectively saved tens of thousands of dollars by not blindly purchasing every new plugin that comes out. And, of course, those sessions are not recorded intentionally. We only have videos of the tools we love. In evaluating a new plugin, I want to see what the saturation looks like. Here’s an example—you can do this in any DAW.
Try it Yourself:
- The first thing you will do is go to the Tools tab and then to a test generator. NOTE: I have the sound turned off because you don't need to hear this; it’s a visual test.
- Go to a sine wave and put it at 100 for easy math. Then, add whichever plugin you want to see the saturation of. We’ll use Decapitator here for the sake of familiarity.
- After your plugin is in place, bypass it for a second and create something that allows you to see the frequency spectrum (Fabfilter Pro Q4 is handy).
- You should be able to see a beautiful sine wave. Because of the Windowing of the FFT display, the sine wave looks asymmetrical. This can be resolved in Pro Q4 by changing the Resolution to Maximum.
- This input signal will go into the saturating plugin. And this is the lowest, loudest note, a.k.a. the fundamental.
- If you turn on Decapitator (or whichever comparable plugin you’re using), you can see that this pure sine wave expands across the frequency range with harmonic content related to the fundamental.
- If you bypass the plugin, you’ll see you go straight to the sine wave. And when you turn it back on, you’ll see this kind of shoulder at 200. So what relationship is this harmonic to the fundamental? It's an octave. So, anytime in the frequency spectrum, you're an octave up when you double the number. So, in this case, 100 is the fundamental, and 200 is the octave. Then, if you go to 300, it’s an octave and a fifth, then two octaves at 400, and so on.
- But what you can see here is that it's not perfectly digital linear; it's musical and nonlinear. And if you go to Decapitator and start to push the drive more, you’ll get more harmonics.
As you can see here, when you overdrive an analog signal, it produces harmonic saturation that is musical about the fundamental. It’s pretty incredible. How does that happen? It’s magic. That’s why I always say saturation, like toast, was a mistake. But it was a happy accident because it makes things richer. It fills in missing frequencies in sounds. Sweet and crunchy.
To be technically accurate, we do understand that the transformative nature of saturation is based on the transfer curve of the non-linear equipment, i.e., harmonics are created because of the clipping behavior of the device, essentially the waveform is being changed from a sine wave to a square. But that’s not as fun as the toast analogy.
Ok, so now we have made the sound richer, denser, and bigger with saturation.
Stay connected with news and updates!
Join our mailing list to receive the latest news and updates from our team.
Don't worry, your information will not be shared.