Cubase DSP Optimization
Cubase DSP Optimization - Maximize Your CPU's Performance in Cubase
Experiencing Issues During Playback in Cubase
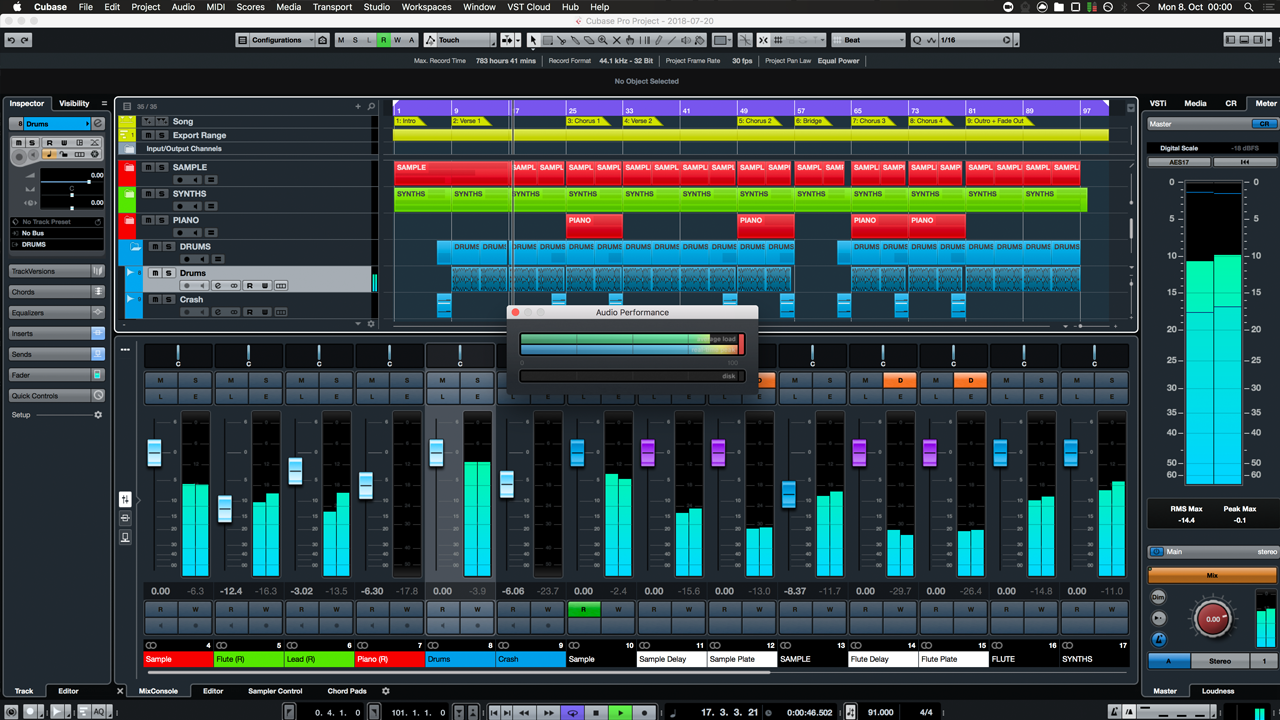
In Cubase, you can see the Audio Performance window by pressing F12. This allows you to check for any performance issues in your DAW. When the Real-time Peak (bottom color bar in the image below) spikes to its max, that's when you hear the artifacts or audio dropouts.
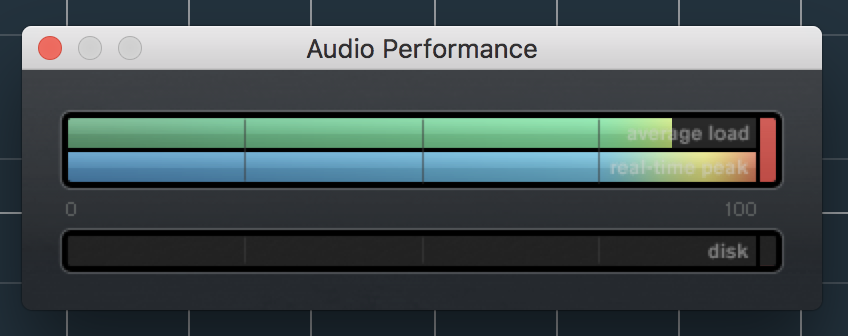
[ Audio Performance Window ]
The amount of calculations CPUs can handle in a second gets better every year with each new generation of processors. However, developers then use any unused additional processing power to create enhancements to their plugins without leaving extra for the DAW. Therefore, we never get ahead of the problem.
What can you do if your computer isn't able to do all the processing, but you still need to deliver a finished song? Part of the problem is that our CPUs have to calculate the signal processing in real-time which means that there isn’t a lot of time to finish calculations and at some point, the CPU can’t keep up with that causing artifacts and dropouts.

Which Cubase Features can Improve your CPU Performance
Rendering virtual instrument tracks and audio tracks which have plugins on them is considered a best practice especially when you want to be able to recall a project in the future. When a DAW company changes which plugin versions they support you can run into this issue, especially when the plugin software provider either goes out of business, discontinues their product or doesn't update its format to keep up with the ever-evolving industry. An Operating System update can also cause this.
An obvious way of getting more processing power out of your CPU is to merely increase the buffer size of your audio interface to the max, but if you are in the middle of creating something from scratch, this is not an option because it is impossible to play any instrument without latency issues if your buffer size is set to above 128 samples.
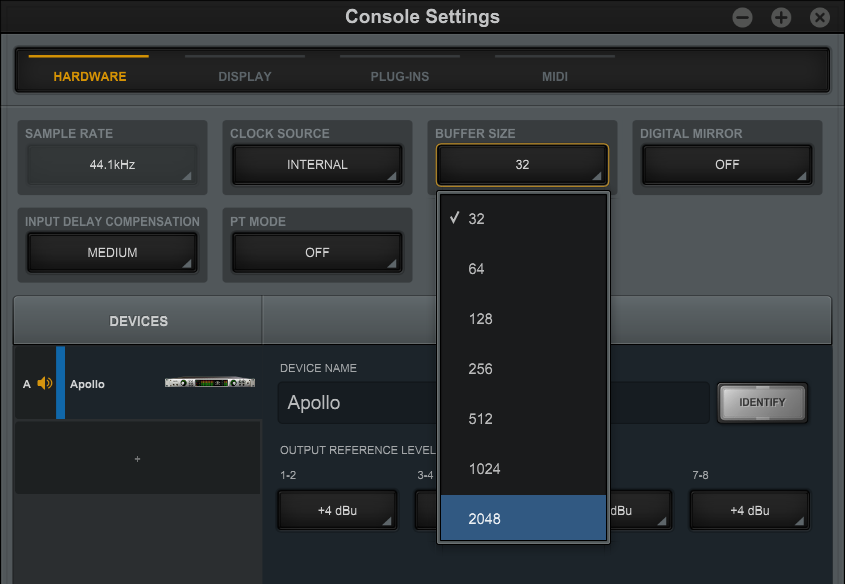
[ Universal Audio Console Settings Buffer Size ]
If you are in the final stages and ready to mix your song, you can quickly increase the latency to the maximum possible buffer size. To address this issue, Cubase introduced a new feature which is called "ASIO-Guard". This feature comes with 3 settings: low, normal, and high. Each setting will give you an increase in how many plugins you can run simultaneously. When using this setting on "high" your computer will allow you to maximize the number of plugins you can run. In some instances increasing the buffer size isn't an option, per example if you are recording audio or a virtual instrument.
Using lots of Plugins and Virtual Instruments When Producing or Mixing?
- Export Audio Mixdown
- Freezing Instruments
- Render in Place
- Direct Offline Processing (audio only)
Export Audio Mixdown
We also can use the "Channel Batch Export" checkbox in the top left corner of that window to do multiple instruments at once. However, when using this technique be aware that it will also capture any insert effects, EQ, or channel strips which have been activated. If you don't want to include this in your export, make sure you disable them first.
Freezing Instruments
There are multiple ways of freezing an instrument track. The easiest way is to select your instrument in the tracklist and go to the left zone in your Project Window and click on the Inspector tab. There you will find the "Freeze Instrument Channel" button in the bottom right section right below the instrument's name.
Click the "Freeze Instrument Channel" button:
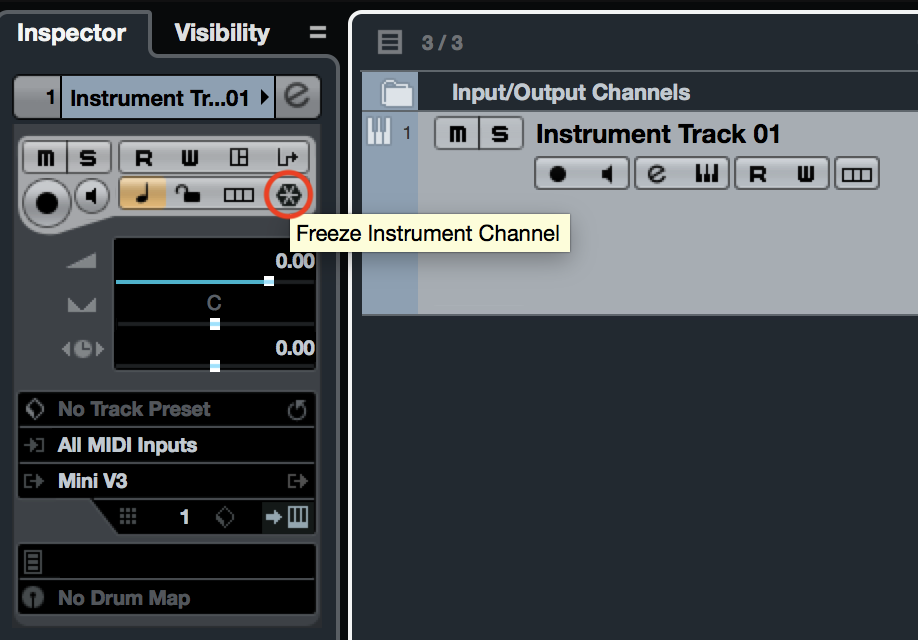
[ Freeze Instrument Channel Button ]
The "Freeze Instrument Option" window opens:
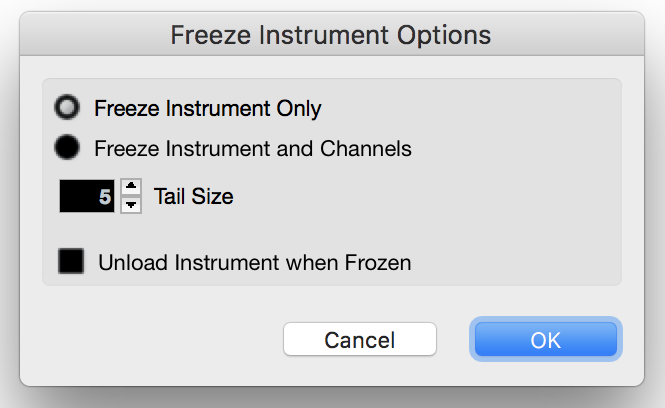
[ Freeze Instrument Options ]
In the "Freeze Instrument Options" window you can choose between two options.
You either choose "Freeze Instrument Only" which allows you to add Insert effects after freezing on the frozen instrument track, or you can choose to "Freeze Instrument and Channels" which will also render your insert effect plugins. Note, that after doing this all insert effects get disabled so you can't change any of the plugin settings anymore unless you first unfreeze the instrument track.
When freezing your instrument you also can set the "Tail Size" time (seconds) which allows you to choose a value which will add a tail to your audio file. That ensures that your instrument doesn't get cut off too early which can be very important for pad sounds or instruments that have a long built-in reverb.
The "Unload Instrument when Frozen" feature is recommended if you are using samplers which load vast amounts of data into your RAM (for example Kontakt, Session Strings, sampled orchestral libraries). Activating this will free up your computer's RAM which will be quite significant especially if you don't have abundant amounts of RAM available.
Unfreeze Instrument
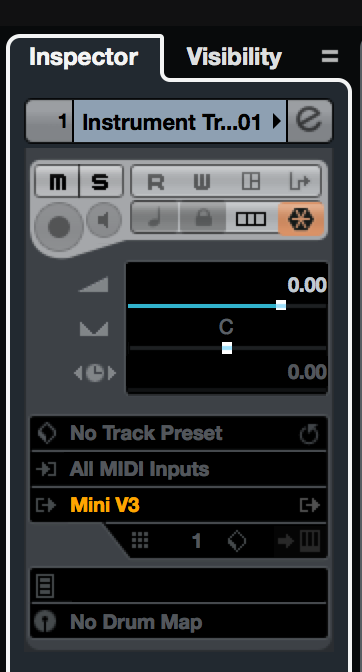
[ Orange Freeze Button in the Inspector Window ]
[ MixConsole Fader Freeze Icon ]
Render in Place
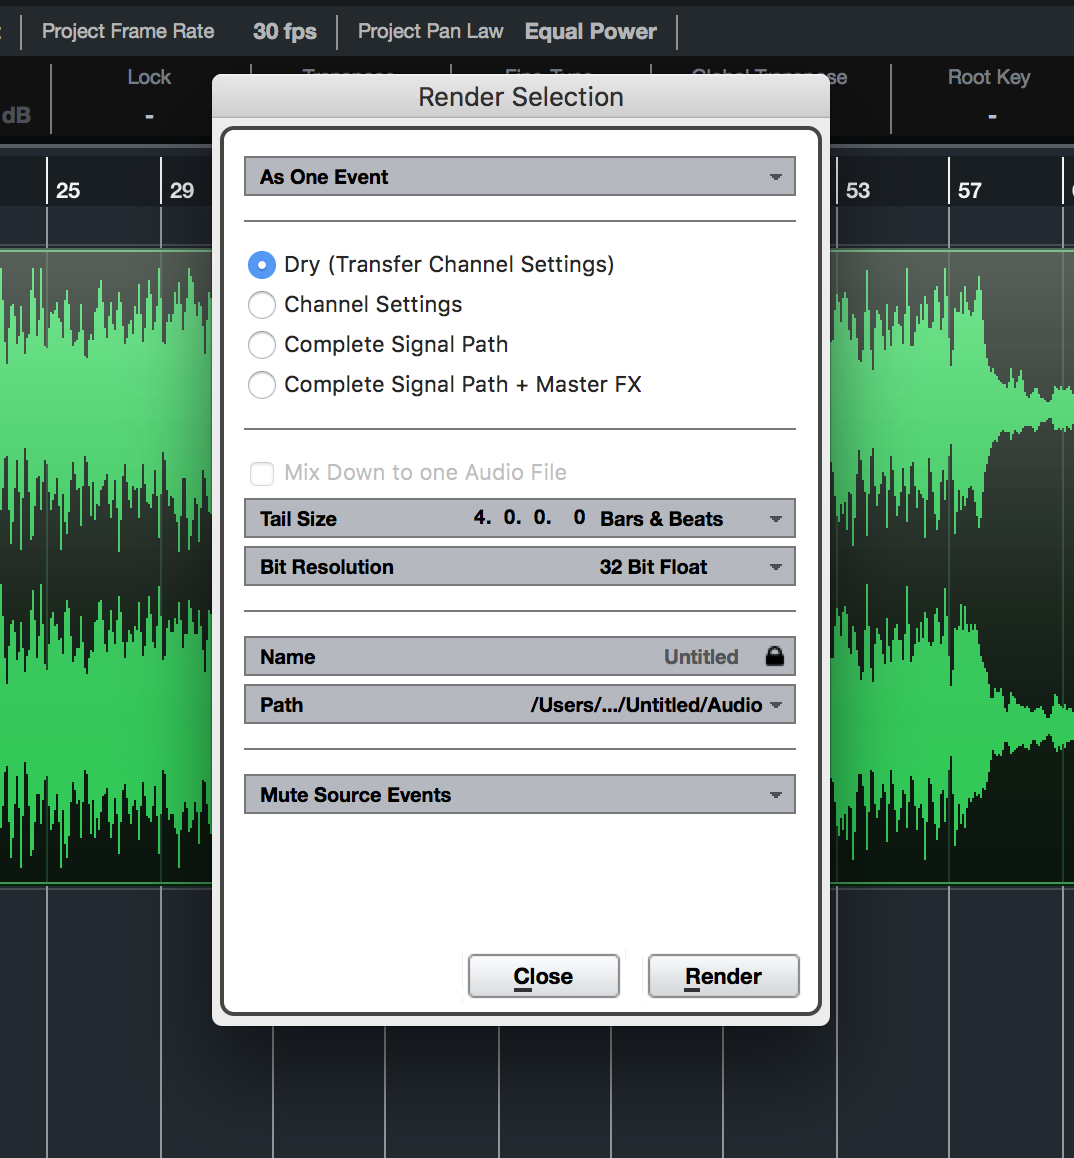
[ Render Selection Window ]
The main advantage of using render in place in comparison to just exporting the instrument track is that it gives you additional options like exporting the instrument "dry" which doesn’t include any plugins on inserts, send effects, EQ, channel strip settings, fader settings or routing paths into the file. However, when the new file has finished rendering, all your settings will be copied over to the new audio channel ensuring that everything sounds exactly the same. This will help to reduce CPU usage which would have been wasted to calculate the instrument in real-time. This helps especially for some power hungry instruments and this can improve your computer's performance quite a bit allowing you to run more effects during mixing. The other 3 options ("General Settings", "Complete Signal Path", "Complete Signal Path + Master FX") allow you to render more of the signal path depending on what setting you need.
I don't want to bore you with the exact details, but if you are interested, I would recommend for you to read about "Render Tracks" in the Cubase Help Manual.
Another great feature of the "Render Selection Dialog Window" is that you can change the "Tail Size" and adjust it using "Seconds" or "Beats & Bars" to ensure that your instrument tail doesn't get cut off too early when rendering. By default, this setting is set to "Off" which might sound weird especially at the end of the song. It might be best to include a tail at the end of each part you render which you can then trim to your liking.
How to Disable an Instrument Track after Rendering
The "Render Selection" window only allows you to "Mute Source Events" but that usually only mutes your MIDI part and the instrument might still be using your CPU in the background, especially if the instrument isn't a VST 3 plugin. The best way to disable your instrument track is to select it in the tracklist, right click on it, and select "Disable Track".
Additionally, to keep perfectly organized, I would recommend hiding the instrument track so it doesn't take up space in your project window. To do so make sure your "Left Zone" is visible first, click on the "Visibility" tab and uncheck the checkmark next to your instrument name.

[ Checked Track Visibility ]
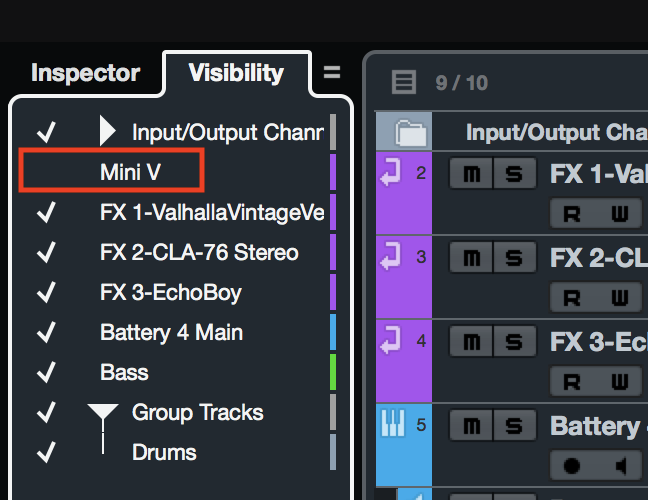
[ Unchecked Track Visibility ]
If you need to change a setting on your instrument for any reason later on you can just set the checkmark for that track in the "Visibility" tab for your instrument track. This will make the instrument track visible again in your track list. You then can right click it and choose "Enable Track".
Rendering Audio Parts in Cubase 9.5
Direct Offline Processing (Audio Only)
Direct Offline Processing renders a new audio file in the background which allows Cubase playback the rendered audio file saving CPU processing power. Even after applying the settings in this feature, you can always change them, rearrange the order of the plugins or add new ones. Depending on the performance of the computer and the length of the plugin chain this all might happen without you even noticing, but older computers might take a couple of seconds until the file is rendered.
Typically this will work seamlessly. In addition to that, it is also possible to quickly render multiple clips at once with the same plugin. A typical example for using this would be to run all your drum channels through the same tape machine plugin. Similar to the render in place function you can also add tails to make sure your favorite reverb plugin doesn't get cut off too soon.
Here are some reasons why you might want to use this feature:
- The need to only fix, change, or enhance a short section using plugin effects
- The benefit to avoid duplicate files and unnecessary automation
- The efficiency of sound design using very long plugin chains
Wishlist for Future Enhancements
Comments and Suggestions

Or iPhone one-tap :
US: +16699006833,,130513269# or +16465588656,,130513269#
Or Telephone:
Dial(for higher quality, dial a number based on your current location):
US: +1 669 900 6833 or +1 646 558 8656
Meeting ID: 130 513 269
International numbers available: https://zoom.us/
Stay connected with news and updates!
Join our mailing list to receive the latest news and updates from our team.
Don't worry, your information will not be shared.

